Follow these steps to complete your store profile.
Complete your store profile using the steps below.
The more accurate your info is, the easier it is for customers to understand your services and get support when they need it.
- Complete your Store details
- Complete your Business info
Next step:
Customize and share your Storefront page:
Everything your customers need in one place.
Your free Storefront puts everything your customers need in one place. Add it to your socials and let followers quickly browse your items, place orders, join your loyalty program, book tables, and much more.
Simple and free. Get started now.
It’s a simple and easy process to set up and share your Storefront Page
1. Apply your branding and theming
If you haven’t already done this to make your menu page look great, be sure to do it now. Your storefront theming is applied to both your page and menu pages.
- Add a theme color in Settings
- Add your logo in Settings
- Add a beautiful cover image in Storefront
2. Add your storefront link to your social media profiles
Grab your storefront link from OtterOrder Storefront
Go to your social media profile and paste your link in as your “website”
What the Storefront Looks Like
- A public-facing URL specific to your business
- All available products displayed in a grid/list
- Normal e-commerce flow:
- Add items to cart
- Proceed to checkout
- Select fulfillment method, such as:
- Pickup at counter
- Pickup at range / curbside
- Delivery (if enabled)
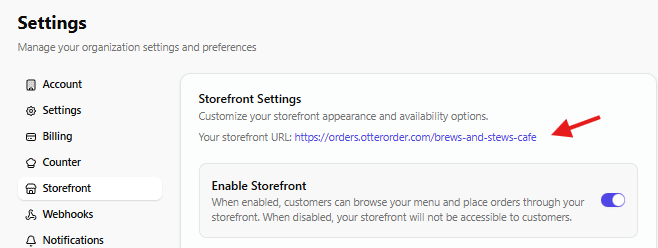
Enable or Disable the Storefront
- Log in to OtterOrder.
- Go to Account > Settings.
- Find the Storefront.
- Toggle:
- On – to allow customers to shop via your storefront URL
- Off – to disable online browsing/ordering if you only want in-lane or in-store ordering.
Many ranges choose to:
- Use the storefront only for in-range or in-store flows (via QR / NFC),
- Or turn it off if they already have a separate e-commerce site.